
Resin 3D Printing for Miniatures: The Complete Beginner’s Guide
Everything you need to print tabletop miniatures at home: choosing a resin printer, slicing and supports, washing, curing, safety and fixing failed prints.

To prime a miniature, clean it, then spray two light coats of miniature primer from 20–30 cm away in a warm, dry place, turning the model between short bursts. Spray primer is fastest and smoothest, brush-on primer is the cheapest and works anywhere (including indoors in winter), and an airbrush gives the finest control once you own one. Black, grey and white each suit different painting styles, and a “zenithal” black-then-white spray gives you free shading. Here’s how each method works, which colour to choose, and how to fix the common problems.
Primer is a thin, slightly gritty paint designed to stick to bare plastic, resin or metal. It does three jobs:
Before priming, wash and clean up your models: How to Prep Resin Miniatures for Painting covers the steps.
| Method | Cost to start | Speed | Finish | Best for |
|---|---|---|---|---|
| Spray can | £10–£15 per can | Fastest | Smooth if conditions are right | Batches of models, armies |
| Brush-on | £4–£8 per bottle | Slow | Good if thinned well | Single models, cold/wet weather, flats |
| Airbrush | £100+ for kit | Fast once set up | Finest, thinnest coat | Regular painters, zenithal priming |
Safety: spray outdoors or in a well-ventilated space, wear a mask (FFP2 or better), and keep cans away from heat and flames.
Brush-on primer won’t fill detail as easily as a heavy spray, and you can do it at the kitchen table on a winter evening.
| Colour | Pros | Cons | Great for |
|---|---|---|---|
| Black | Hides missed spots; instant deep shadows; dark, moody look | Bright colours need more coats | Undead, armour, metals, dark fantasy, sci-fi |
| Grey | Shows detail clearly; colours look true | Less dramatic | All-rounder, beginners |
| White | Bright colours pop; essential for contrast/speed paints | Shows every missed spot; colours can look flat | Bright heroes, contrast paints, yellows and reds |
| Coloured (e.g. red, bone, green) | Primer becomes your base coat | Fewer shades available | Armies with one main colour |
Can’t decide? Grey.
“Zenithal” means lighting from directly above, like the sun at midday. You fake it with primer:
The result looks like a black-and-white photo of the model, lit from above. It shows where the light falls, so your highlights land in the right places, and it makes contrast paints and thin glazes look shaded automatically. Spray cans work, but an airbrush gives smoother gradients.
| Problem | Cause | Fix |
|---|---|---|
| Rough, grainy, “fuzzy” surface | Too cold or humid; sprayed too far away so primer dried in the air | Brush the dry model with an old toothbrush; re-prime in better conditions, slightly closer |
| Detail filled in | Too much primer at once | Strip and re-prime with thin coats |
| Primer pools and runs | Sprayed too close or too long | Wipe while wet, or strip once dry |
| Primer beading (fisheyes) | Grease or residue on the model | Strip, wash with soapy water, dry fully, re-prime |
| Primer rubs off | Model not cleaned, or handled too soon | Wash before priming; leave to cure overnight |
| Spray spits blobs | Nozzle clogged; can cold | Clean nozzle; warm can; turn upside down and spray to clear after use |
Stripping primer: isopropyl alcohol (90%+) strips most primers from plastic and metal. For resin, keep soaks short (minutes, not hours) and scrub gently. Some people use specialist hobby strippers; test on a spare first.
Do I need to prime miniatures? Yes, for anything you’ll handle or play with. Paint chips easily from unprimed models.
Can I use car primer or DIY spray paint? Some car primers work well and are cheaper, but they can be thicker and hide detail. Test on a spare piece first.
How long should primer dry before painting? At least an hour, ideally overnight, especially for spray primer.
Is black or white primer better for beginners? Grey is easiest. Black is more forgiving of gaps; white makes bright colours pop.

Everything you need to print tabletop miniatures at home: choosing a resin printer, slicing and supports, washing, curing, safety and fixing failed prints.
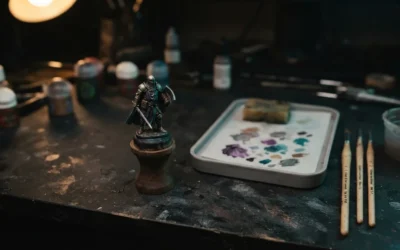
A step-by-step beginner’s guide to painting D&D miniatures: the starter kit, then prime, base coat, wash, highlight, base and seal.
Buying for someone who rolls dice, paints tiny heroes or plans elaborate dungeon crawls can feel like stepping into a wizard’s workshop blindfolded. Do they...
Walk into any games night and you'll find two tribes of miniatures sharing the table: grey plastic warriors clipped from sprues, and crisp resin models fresh...

Artisan Guild is one of the best-known fantasy STL studios. We look at the style, modularity, how the files print, and whether to subscribe or buy prints.

Stop primer beading, peeling and going tacky. A step-by-step routine to wash, clean up, straighten, assemble and prime resin miniatures, and fix it when it goes wrong.

Everything you need to pick a miniature for your D&D character: the right base size and scale, matching class and gear, poses, painting difficulty and the best places to find one.

One Page Rules is a free, fast, model-agnostic family of wargames. Here’s how the rules work, which game to start with, and how to build your first army with minis you already own.