
How to Thin Miniature Paints (and How Thin Is Too Thin)
How to thin acrylic miniature paints: the right ratios for base coats, layers and glazes, what to thin with, and how to tell when it’s too thick or too thin.

To support a miniature for resin printing, tilt it 30–45° so no large flat area prints in one layer, put light supports on fine details, medium supports on the body, and make sure every “island” (a part that starts in mid-air) has at least one support under it. Then check the model layer by layer in your slicer before you print. Get those four things right and most failed prints disappear.
This guide walks through supporting a 28–32 mm tabletop miniature step by step, with settings that work as a starting point in Lychee Slicer and Chitubox.
Many sculptors sell their STLs pre-supported. For your first few months, use them. The sculptor has already tested the angle and the supports, so you can focus on getting your printer, resin and exposure right.
Learn to support models yourself when:
| Term | What it means |
|---|---|
| Island | A part of the model whose first layer has nothing below it (a fingertip, a sword tip, the bottom of a chin). It must have a support or it prints into thin air and fails. |
| Raft | The flat base the supports stand on, stuck to the build plate. |
| Light / medium / heavy support | Tip size of the support where it touches the model. Light tips leave small marks, heavy tips hold weight. |
| Suction (cupping) | A hollow, cup-shaped area that traps resin and creates a vacuum as the plate lifts. It causes cracks and blow-outs. |
| Peel force | The pull on the model every time a layer separates from the vat film. Big flat layers mean big peel force. |
Orientation does more work than supports. Most failed miniatures come from a bad angle, not too few supports.
For 28–32 mm minis, print solid. They use only a few millilitres of resin, and solid parts are stronger for gaming.
Hollow anything bigger than about 50 mm (monsters, busts, large terrain), with walls of about 2 mm and at least two drain holes near the lowest point as printed. One hole lets resin out; the second lets air in so there’s no suction.
Start with your slicer’s automatic supports on “medium” and then edit by hand. A good layout for a 32 mm hero:
Starting points (adjust for your resin):
| Setting | Light | Medium | Heavy |
|---|---|---|---|
| Tip diameter | 0.25–0.3 mm | 0.35–0.45 mm | 0.5–0.7 mm |
| Tip length | 1–1.5 mm | 1.5–2 mm | 2 mm |
| Raft height above plate | 5–8 mm lift (clearance for removal) |
This is the step beginners skip.
One missed island won’t always ruin a print, but it shows up as a missing finger or a blob of crusty resin.
More minis per plate saves time, but:
| Mistake | What you’ll see | Fix |
|---|---|---|
| Model printed upright or flat | Layer lines across the face, delamination, model torn off supports | Tilt 30–45° |
| Supports too light overall | Model sags, drifts or falls into the vat | Heavier anchors at the bottom, more medium supports |
| Supports too heavy on details | Ugly pockmarks, snapped fingers during removal | Light tips on details |
| Missed islands | Missing tips, crusty blobs | Island check + layer scroll |
| Cup shapes | Cracks, holes, “blow-outs” | Reorient or add drain holes |
Take supports off before curing, while the resin is still slightly soft, and wear gloves. Warm water (not hot) softens them further. Snip with flush cutters close to the model, don’t twist them off, then sand the nubs after curing. The full process is in How to Prep Resin Miniatures for Painting.
What angle should I print miniatures at? Between 30° and 45° from the build plate works for most 28–32 mm miniatures. Tilt the model backwards so the face points up and away from the plate.
Do I need to hollow 32 mm miniatures? No. Small minis print better solid. Hollow only larger models, and always add at least two drain holes.
Why do my prints have holes and cracks? Usually suction from a cup-shaped area or a hollow model without drain holes. Reorient the model or add holes.
Light, medium or heavy supports for fingers and weapon tips? Light. Use medium for limbs and cloak edges and heavy only for the base of the model and the raft.
Is automatic support enough? It’s a good start, but always run an island check and scroll the layers before printing. Auto-supports often miss small islands.

How to thin acrylic miniature paints: the right ratios for base coats, layers and glazes, what to thin with, and how to tell when it’s too thick or too thin.

Prime miniatures the right way: spray, brush-on and airbrush methods, which primer colour to pick, zenithal priming, and fixes for fuzzy or beading primer.

Everything you need to print tabletop miniatures at home: choosing a resin printer, slicing and supports, washing, curing, safety and fixing failed prints.
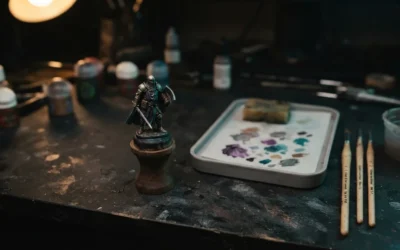
A step-by-step beginner’s guide to painting D&D miniatures: the starter kit, then prime, base coat, wash, highlight, base and seal.
Buying for someone who rolls dice, paints tiny heroes or plans elaborate dungeon crawls can feel like stepping into a wizard’s workshop blindfolded. Do they...
Walk into any games night and you'll find two tribes of miniatures sharing the table: grey plastic warriors clipped from sprues, and crisp resin models fresh...

Artisan Guild is one of the best-known fantasy STL studios. We look at the style, modularity, how the files print, and whether to subscribe or buy prints.

Stop primer beading, peeling and going tacky. A step-by-step routine to wash, clean up, straighten, assemble and prime resin miniatures, and fix it when it goes wrong.

Everything you need to pick a miniature for your D&D character: the right base size and scale, matching class and gear, poses, painting difficulty and the best places to find one.

One Page Rules is a free, fast, model-agnostic family of wargames. Here’s how the rules work, which game to start with, and how to build your first army with minis you already own.